Give someone access
Adding a person takes two decisions: which venues they work with, and how much of the back office they need. You make the first when you invite them, and you can change both afterwards.
Adding someone here gives them a login. It does not put them on a tip sheet or pay them anything. People who earn tips live in the venue view under Staff Management — see Venue and admin views.
Find the Users screen
In the admin view, choose Users from the menu down the left. The page is headed Admin Users & Roles and opens on the Users tab.
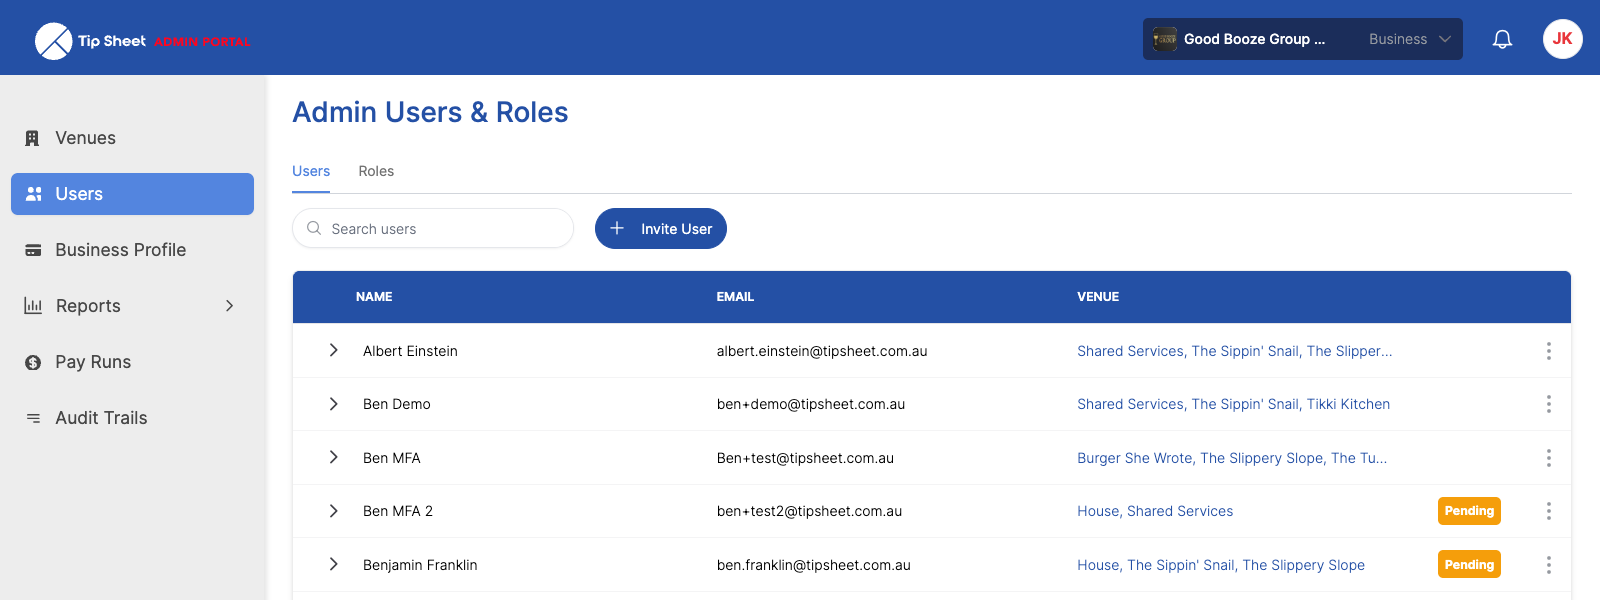 1. Choose Users2. Invite User
Everyone who can sign in to this business. Pending means the person has been invited but hasn't set up their login yet.
Everything in this guide starts here. The Roles tab beside it is covered in Roles.
Invite them
Choose Invite User, at the top of the list.
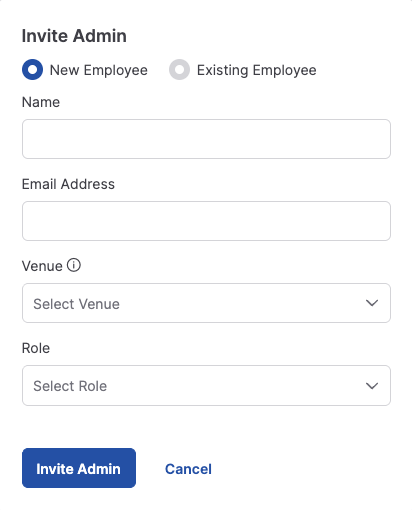
The invite box. It's headed "Invite Admin", and the button at the bottom says the same.
- New Employee / Existing Employee — choose Existing Employee if the person is already in your business (they already earn tips, say, and now need a login too). Otherwise leave it on New Employee and type their details.
- Name and Email Address — the invitation goes to this address, so check it.
- Venue and Role — one of each to start with. You can add more venues straight afterwards, which is what the information icon beside Venue is telling you.
Choose Invite Admin to send it. Their row appears in the list marked Pending until they accept and set a password. While it's pending, the row's menu offers Reinvite if the email goes astray.
Choose their venues and roles
Select the arrow at the left of someone's row to open their venue list.
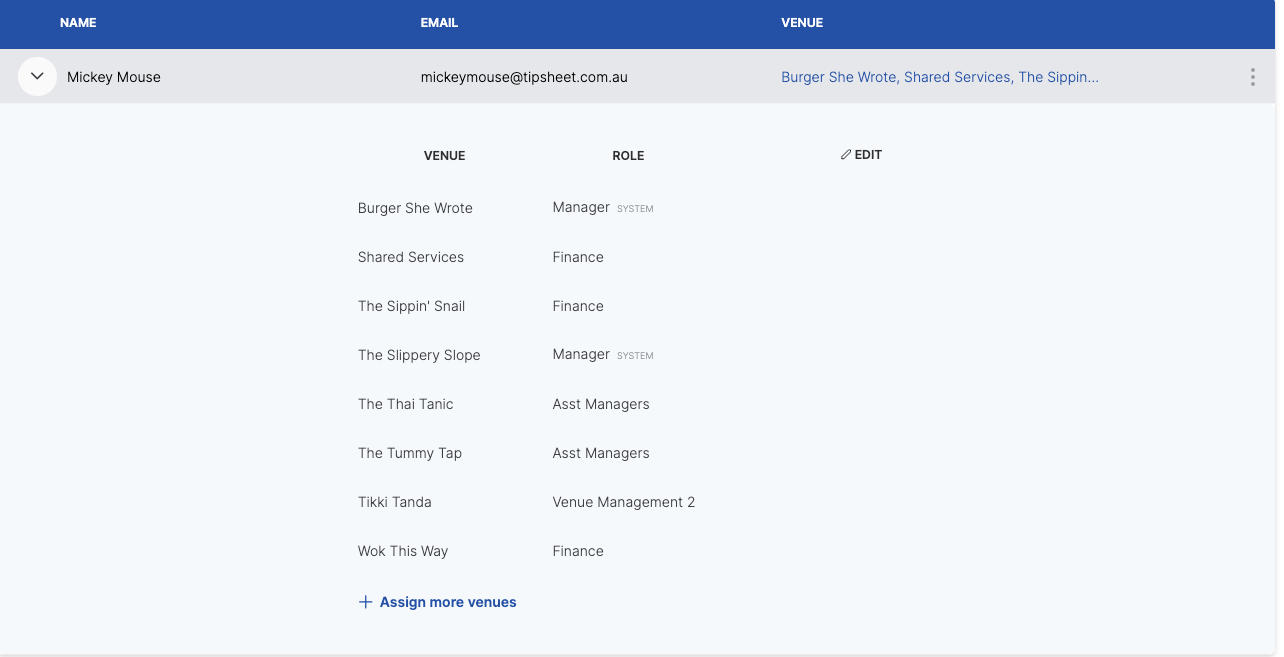 1. Open their venues2. Edit to change them
One row per venue, each with its own role. The same person can be a Manager at one venue and something much narrower at another.
Choose Edit to change anything.
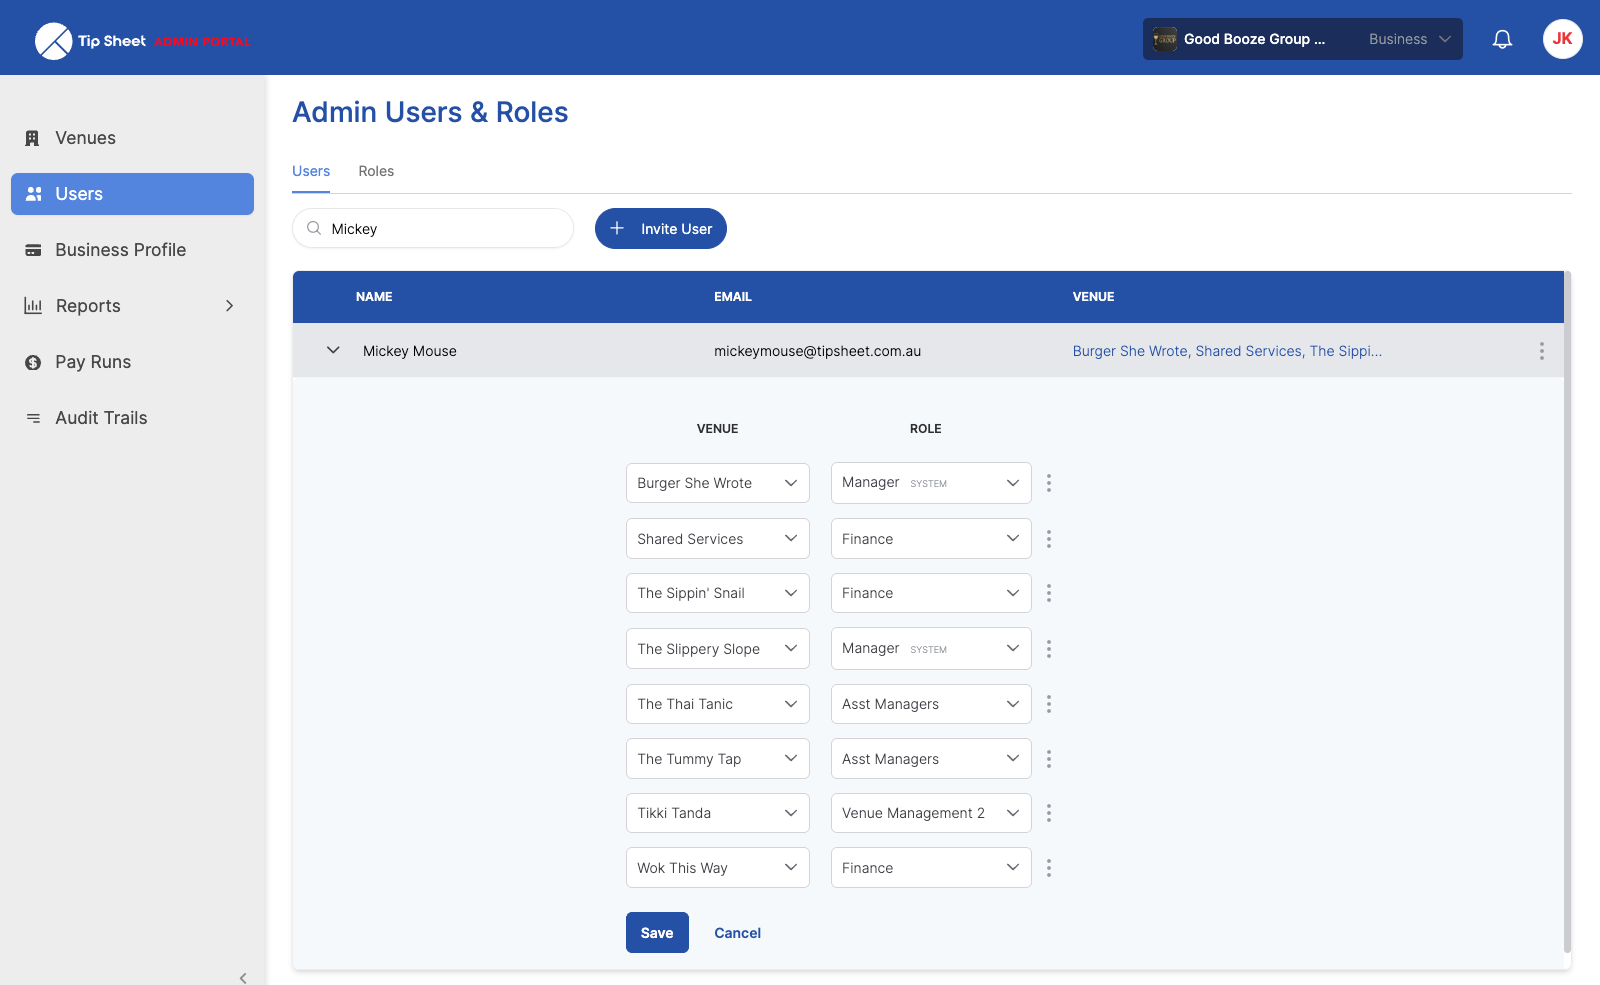 Swap the roleThen Save
In edit mode every row becomes a pair of dropdowns, with its own menu at the end and Save and Cancel underneath.
From here you can:
-
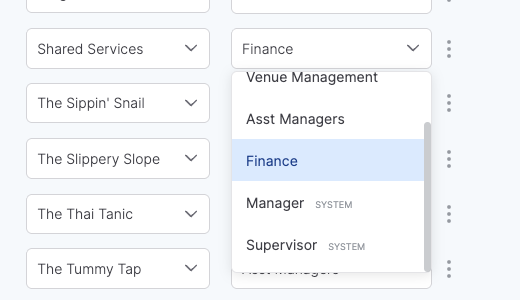
Change a role — pick a different one from the dropdown. Your own roles are listed first, with Manager and Supervisor marked SYSTEM at the bottom.
-
Assign more venues — adds another row.
-
Remove a venue — the row's menu has Delete. Nothing is removed until you choose Save, and Undo Delete puts it back before then.
-
Depart from the role for this one venue — see Custom permissions.
Choose Save when you're done. Cancel discards the lot, including any permissions you ticked along the way.
There's no "give them everything" switch for venue access. Someone who looks after six venues needs six rows. That's deliberate — it's what lets a manager approve their own venue's week without touching anyone else's.
Decide how much back office they get
Venue roles say nothing about the admin view. That's set separately, per person: open the row's menu and choose Business Permissions.
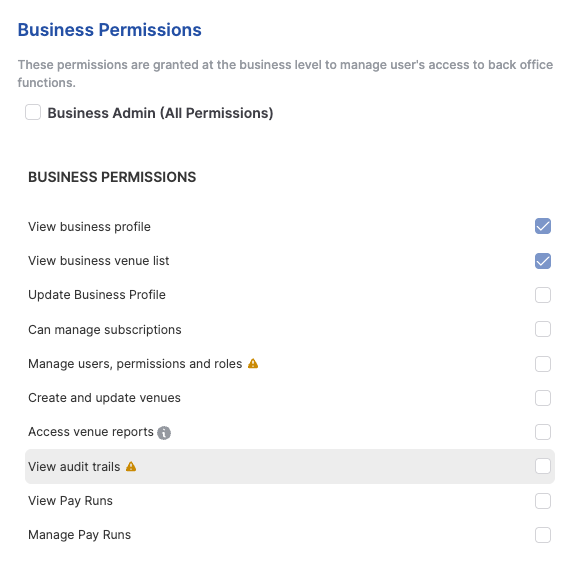
Business Permissions. The first two are ticked and greyed out — they can't be removed.
Business Admin (All Permissions) at the top is the shortcut: tick it and the person gets everything in the admin view, now and in future. It's the right answer for a business partner or an operations manager, and the wrong answer for most other people.
Otherwise tick what they need. Three of them deserve a moment's thought, and Tip Sheet marks them with an icon for exactly that reason:
| Permission | What it really means |
|---|---|
| View audit trails | The whole business, including venues this person isn't assigned to. It's the one that most often grants more than people expect. |
| Manage users, permissions and roles | They can assign anyone to any venue, and create or delete roles. In practice this lets them grant themselves more access. |
| Access venue reports | Limited to the venues they're assigned to, so it's narrower than it sounds. |
Choose Save.
Managing access afterwards
The menu on someone's row covers the rest.
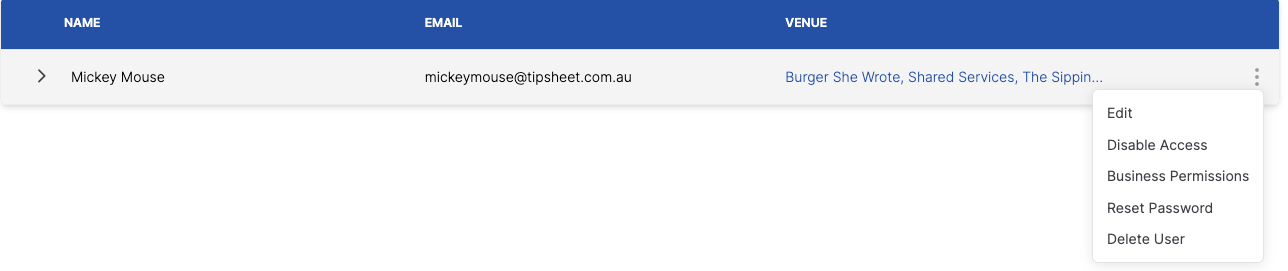
What's on the menu depends on the person — a pending invite shows Reinvite, and someone already switched off shows Enable Access instead of Disable Access.
| Option | What it does |
|---|---|
| Edit | Change their name or email address. |
| Reinvite | Sends the invitation again. Only while the invite is still Pending. |
| Disable Access | Switches the login off without deleting anything. Their history stays intact. This is the right choice when someone leaves. |
| Enable Access | Switches it back on. Shows in place of Disable Access for someone already switched off. |
| Business Permissions | The back-office tick list above. Hidden for anyone whose access is switched off. |
| Reset Password | Sends them a reset. Only for people who have actually set up a login. |
| Delete User | Removes them permanently. |
Disable Access is almost always the better choice. It stops the person signing in but keeps their name against everything they did — every tip edit, every period they locked, every payment they approved stays attributed in the audit trail. Deleting is permanent, and you lose the ability to answer "who changed this?" later.
Someone who hasn't set up their login yet has no password to reset and nothing to disable, so those options don't appear on their row until they've accepted the invitation.